Mastering your PMU specialty takes a lot of time, proper education and practice. However, your procedure could be beautiful, but if it’s not photographed correctly, it can give a different perspective to potential clients who may want to take a look at your portfolio before they book. So, to be sure you showcase your procedure properly, Microbeau has put together this simple photography guide so you can up your portfolio game.
-
The Camera
First, it’s important to have a quality camera, or at least a cell phone with a quality built-in camera. It doesn’t have to be expensive, but if you can configure its aperture settings, then you’re on the right track.
The aperture is the opening within the camera’s lens which allows light to pass. It is calibrated in f/stops and is generally written as numbers such as 1.4, 2, 2.8, 4, 5.6, 8, 11 and 16.
Be sure to utilize low aperture settings when taking photos of your work. This allows the camera to minimize focus of the background, and pull more focus towards your work. Remember, your work is the main subject of this photo - not your studio.
To achieve the same effect without aperture settings, be sure to position yourself further from your client, and zoom into your subject. This will produce the same effect and pull more focus to your work.
-
Lighting
Having a quality camera means nothing without proper lighting, and it’s important to stay consistent, and natural - or ambient - lighting won’t provide it. This can make or break your photo, so it’s important to have your subject properly lit. Although studio-grade lights would be the best choice, artists on a budget can also utilize a simple ring light.
Be sure to adjust the lighting into different positions to eliminate any shadows or glares. It also should be placed closer to your client so it can properly bounce the light off the work and ultimately produce better quality photos.
-
Directing Your Client
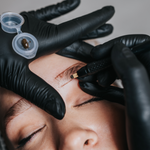
Finally, knowing how to properly position your client, helps keep the consistency within your portfolio. There are two ways you should position your client’s head, when photographing your work.
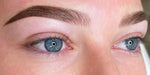
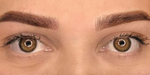
The first is to have them look straight at the camera for a frontal close up. The second is to slightly tilt their head, while still facing the camera, for a ¾ frontal effect.
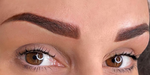
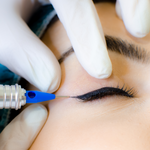
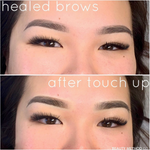
After positioning your client’s head to the right angle, the next step is to ensure each has the same facial expression. When showcasing brow and eyeliner procedures, have your client look directly at the camera or off into the distance. For lips, have them slightly smile without showing teeth.
These are the three key elements of properly photographing your procedures. Remember, your portfolio is what will determine whether you’ll be booked or always available. Allow your work to speak for itself when presenting to potential clients.