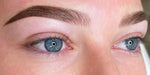
Preparation is paramount for safe, healthy, professional PMU procedures. Ensuring a clean and organized workspace not only safeguards your clients but also enhances the overall experience. This guide gives you a step-by-step approach to setting up your PMU station for optimal safety, efficiency, and professionalism.

Sanitize Your PMU Station
Begin by thoroughly cleaning your metal tray table using medical-grade sanitizing wipes. Next, cover the surface with a dental bib to create a protective barrier for your tools and supplies.
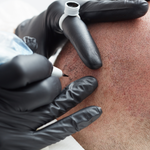
Prep Your PMU Machine
Your PMU machine is the cornerstone of your work. Keep it running smoothly and:
-
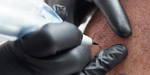
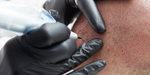
Clean Thoroughly: Disinfect the machine body with medical-grade sanitizing wipes or a UV sanitizing device. Pay close attention to crevices around the grip and motor housing.
-
Wrap Securely: Encase the machine in cling wrap, followed by two layers of grip (bandage) wrapOpens a new window, focusing on the needle insertion area. Make sure the wrap doesn’t interfere with needle depth control.
-
Cord Management (If Applicable): If you’re using a corded machine, cover the cord with a protective sheath (clip cord cover) to prevent contamination.
-
Opt for Disposable Grips: These maintain the machine’s ergonomic design without added bulk and come pre-sterilized for convenience. Just be sure your disposable gripOpens a new window is securely fastened and doesn't shift while you’re working.
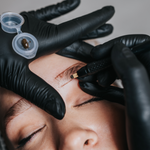
Organize Your Essentials
Before getting started on any procedure, ensure the following items are sanitized and arranged on your tray:
-
Mapping Tools: Pencils or string for precise design outlines.
-
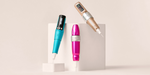
Pigment Setup: Fill pigment cups (like Saferly's skull-shaped ink capsOpens a new window) placed in a sanitized holder, wrapped in plastic. Add a small amount of numbing cream and tattoo glide to the cups for easy access.
-
Application Tools: Lint-free applicators or sterilized cotton swabs for product application.
Final Touches to Your Tray
Maximize safety and efficiency with these additional preparations:
-
Pre-soaked Materials: Prepare gauze or cotton rounds soaked in distilled water or green soap.
-
Sanitized Liquids: Ensure your washer bottle is disinfected and wrapped in plastic.
-
Glove Protocol: Always wear Recovery glovesOpens a new window when handling any items on the tray to maintain sterility.
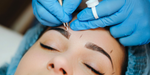
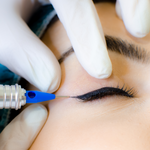
Needle Management
Keep your needles sterile by ensuring your cartridges are sealed until the procedure begins. This practice minimizes the risk of cross-contamination for client safety.
Personal Protective Equipment (PPE)
Protecting yourself is as crucial as protecting your client:
-
Wear PPE: Don a Saferly face maskOpens a new window and Saferly hair netOpens a new window throughout the procedure.
-
Glove Discipline: Change gloves if you touch any non-sanitized items, like phones or lamps.
-
Barrier Film: Use barrier film to cover frequently touched surfaces, including chair or table controls or lamps.
Embrace Touchless Technology
Integrate touchless solutions like the Hover Touchless Power SupplyOpens a new window into your setup. This device allows you to adjust voltage, navigate menus, and set timers with a simple hand gesture, reducing contact and improving hygiene.
PMU Station Checklist
Ensure your station is equipped with the following:
-
Opens a new windowHover Touchless Power SupplyOpens a new window (or your preferred power source)
For all your permanent makeup needs and tattoo supplies, explore DarklabOpens a new window and Painful PleasuresOpens a new window and build the setup that’s right for you.
Get Prepped & Go!
A meticulously prepared workspace is the foundation for any successful PMU procedure. By sticking to these guidelines, you’ll enjoy smoother, safer, more efficient procedures. Your clients will thank you and keep coming back for more.