Choosing the right PMU needle diameter can make a dramatic difference in how you approach hair strokes, soft brow shading, and lip color.
But choosing the right size isn't simply a matter of going finer or larger. Your technique, the client's skin, and your desired results all factor into the decision.
In this guide, we'll compare .20mm, .25mm, and .33mm PMU needles to help you understand their differences and choose the right diameter for your work.
Read the Needle Label Before You Compare
Diameter refers to the width of the individual needle body before it tapers to a point, measured precisely in millimeters. A .20 is thinner than a .25, while a .33 is the most substantial of the three.
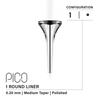
When you look at a label like 0.25mm/1RL, every element provides a crucial specification for your setup:
- 0.25mm: The exact diameter of each individual needle.
- 1: The total number of needles in the cartridge.
- RL: The round liner configuration.
Even if a .25 mm cartridge features a grouping of three needles, the individual needles still measure exactly .25 mm in diameter. However, this individual needle diameter doesn’t refer to the total width of the grouping. Because label formats vary, always verify your manufacturer's specific technical guidelines.
For a deeper dive into understanding PMU needle groupings,, explore our guide on how to choose a PMU needleOpens a new window.

Compare .20, .25, and .33 Needle Diameters by Application
Please note: These are starting points, not rigid rules. Needle grouping, taper, machine settings, technique, and your client's skin all influence how each diameter performs.
|
Diameter |
Common applications |
What to evaluate |
|
.20 mm |
Fine hair strokes, delicate details, and precise linework |
Whether you can achieve clear, consistent detail with adequate pigment retention and minimal repeat passes. |
|
.25 mm |
Hair strokes, brow shading, lip contours, and versatile everyday PMU work |
How well it balances fine detail with controlled pigment delivery across your preferred techniques. |
|
.33 mm |
Fuller lip color, broader shading, and techniques requiring greater pigment delivery |
Whether you can build even saturation efficiently while maintaining control and avoiding unnecessary skin trauma. |
To see how these differences translate into actual PMU techniques, consider a few machine and cartridge combinations. Our PMU machine and cartridge pairingsOpens a new window include a .25mm long-taper single round liner for crisp brow hair strokes and a .33mm long-taper single round liner for lip shading. These examples show how diameter works alongside other cartridge characteristics to support different techniques.
Keep Diameter and Taper Separate
Needle diameter refers to the width of the needle body, while taper describes how gradually it narrows toward the tip. Two needles can have the same diameter but different tapers, affecting how they interact with the skin and deliver pigment.
When comparing diameters, keep the needle count, configuration, and taper consistent. Otherwise, you won't know which difference is responsible for the change in performance.
Remember that a needle's diameter alone doesn't directly determine the width of a healed hair stroke or how much pigment it deposits. Working depth, technique, and needle configuration also influence your results!
How Skin Type Affects Needle Selection
Your client's skin should factor into your needle selection, but no single diameter is right for every skin type.
For thin or mature skin, consider elasticity, fragility, and how the skin responds to your technique. A finer needle isn't automatically the best choice, and a slightly larger diameter may offer more control depending on your approach.
Oily skin doesn't automatically require a .33mm needle, either. Evaluate the skin's texture, thickness, and response rather than assuming oily skin is always thicker.
Client comfort is another consideration. A .20mm needle doesn't guarantee less discomfort or skin trauma. Working too deeply or making excessive passes can overwork the skin regardless of needle diameter.
If pigment isn't implanting consistently, reassess your skin stretch, angle, pigment flow, and needle depthOpens a new window before switching cartridges.
Decide What a Cartridge Change Should Achieve
Before switching diameters, pinpoint exactly what your next pass requires: finer detailing, broader coverage, or a completely different tactile feel.
A .25 1RL and a .25 shader share an identical individual needle diameter, but their contact patterns are vastly different. If your vision calls for shading a larger canvas, adjusting your grouping will likely serve you better than simply selecting a wider single needle. Always consider how your PMU machine and chosen needle harmonizeOpens a new window to support your specific technique.
Moreover, you can absolutely utilize multiple diameters within a single session. You might select a .25 mm single round liner to perfect a lip contour, then transition to a .33 mm single round liner for rich shading. Make the switch because it empowers your technique and improves your results, not because every outline and fill strictly demands a different tool. Every new cartridge you use must be sterile and single-use.
Troubleshoot Before Blaming Needle Diameter
While your application and healed results offer vital clues, they rarely point to diameter as the sole culprit. Review these critical variables before overhauling your setup:
- Faint or broken strokes: Verify your pigment flow, and assess the harmony between your hand speed and machine speed.
- Strokes that heal wider than intended: Re-evaluate your working depth, and ensure you aren't making repeated passes over the identical stroke.
- Patchy healed color: Consult your session notes to check for uneven application pressure and shifts in skin response.
- Increasing irritation: Reassess your concentrated work areas and pass counts, rather than stubbornly chasing darker fresh color.
At a consistent machine speed, slowing your hand motion naturally concentrates more needle contacts within a given area. Mastering this relationship between hand speed, pigment placement, and skin responseOpens a new window ensures you know exactly when your technique needs a subtle adjustment.

Test Diameter With a Repeatable Practice Drill
Practice skin provides a stress-free environment to compare cartridges, refine your signature movements, and build absolute confidence.
Use this deliberate drill on practice skins to fully understand how diameter influences your work:
- Choose your cartridges. Compare .20mm, .25mm, and .33mm single round liners from the same cartridge line, keeping the taper consistent.
- Use the same setup. Keep your machine, speed, pigment, and practice skin the same for each diameter.
- Repeat the same exercise. Create several lines and small shaded areas with each needle, using the same movements and number of passes.
- Compare the results. Look at line width, consistency, and pigment coverage to see how each diameter performs.
- Find your preference. Consider which diameter gives you the most control and the results you want for each technique.
Choose the Right Diameter for Your Technique
The right needle diameter depends on your technique, your client's skin, and the results you want to achieve. Understanding the differences between sizes gives you a better starting point, but testing them with your own setup is the best way to find what works for you.
Explore our Vertix needle cartridgesOpens a new window to compare your options. Vertix Pico round liners come in .20mm, .25mm, .33mm, and .38mm diameters, with several taper options. Vertix Nano single liners are available in .20mm, .25mm, and .33mm, featuring an acupuncture taper and a transparent, detachable tip for improved visibility.
Compare the available configurations and choose the diameter and taper that suit your work.