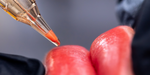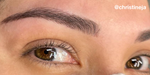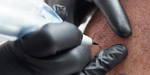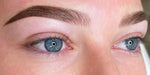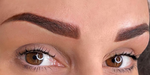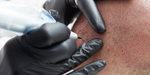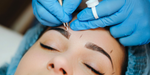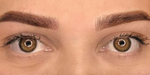
There's nothing worse than seeing a client return for a touch-up with zero pigment left. You know you put the work in, but the skin didn't hold it.
Perfect healing isn’t just about the machine. While the right tools matter, around 70% of a beautiful healed result comes down to understanding the skin itself. This cheat sheet takes the guesswork out of the process, breaking down exactly how the skin works. You’ll discover how to reach the ideal depth, work with different skin types, and get those crisp results every time.
Layers of the Skin Where PMU Is Implanted
Achieving beautiful results starts with knowing exactly where your needle lands. Picture the skin as a layered map—if you’re unsure which level you’re working in, pigment may not heal as expected.

1. The Epidermis
The epidermis is the skin’s outermost layer and is constantly renewing itself. For most adults, this cycle takes about 28 to 45 days. When pigment is placed too close to the surface, it remains in this layer and disappears as the skin heals. That’s often why color can vanish or fade significantly within the first week.
2. The Dermis
The dermis is the middle layer of skin and the prime spot for PMU and tattooing. Pigment here stays put and holds its shape, so results last long after the initial healing is over.
3. The Hypodermis
The hypodermis lies beneath the dermis and is composed of fat. If the needle goes this deep, pigment tends to spread out, causing blowouts and blurred lines that are tough to correct.
If finding the right depth still feels tricky, it helps to learn how to start practicing PMU as a beginnerOpens a new window on latex before moving on to real skin.
Different Skin Types and Their Impact on PMU
Getting the depth right is only part of the process. It’s just as important to pay attention to each client’s unique skin type. Everyone’s skin is different—factors like texture and oiliness can completely change how the ink settles. Here are some practical tips for working with the most common skin types you’ll encounter in the studio.
Oily Skin
Oily skin, with its larger pores and extra oil, can leave your work looking blurry once it heals. Pigment tends to spread more easily, so it helps to use a tighter, more controlled technique—working in smaller, precise movements and building the color gradually instead of trying to pack in too much at once.
Dry Skin
Dry or flaky skin can be challenging because it tends to resist the needle, making it harder for pigment to properly settle into the dermis. Slow your approach, pay close attention to how the skin is responding, and only add pigment when it’s receptive. Well-hydrated skin will always take ink more consistently and evenly.
Sensitive Skin
Sensitive skin reacts quickly to trauma—redness and swelling can show up almost instantly. Work efficiently and avoid going over the same area too much. Once the skin is too swollen, it’s tough for pigment to stay put.
Mature Skin
Mature skin is thinner and less elastic, so it’s easy to go too deep or cause a tear. Using a gentle touch and taking a “less is more” approach helps keep the skin safe. Overworking mature skin almost always leads to slower or poor healing.
Other Skin Conditions That Affect PMU Results
Skin type matters, but it’s not the only thing that affects how your work heals. Other skin conditions can also make a big difference. You usually won’t have to change your basic technique, but it helps to manage your expectations and your client’s. Knowing about these conditions is key to understanding what truly safe PMU looks like for each person.Opens a new window
Melanin and Contrast
Your tattooing fundamentals stay the same regardless of skin tone, but melanin does influence how healed color is perceived. In higher-melanin skin, pigment is viewed through a natural “filter,” which can subtly shift how tones read once healed. That’s why intentional color selection matters—prioritizing contrast and clarity helps ensure the design remains readable over time.
This is where consultation and swatching become essential. Talk through color expectations with your client, review healed references when possible, and swatch tones directly on skin or synthetic practice surfaces to see how they sit in context. Taking the time to test and plan upfront helps you choose shades that not only look strong on melanated skin, but hold their integrity as they heal.
Sun-Damaged Skin
Sun-damaged skin can be unpredictable. Some areas might be thicker, while others are thinner, making it difficult to heal.This type of skin doesn’t always take pigment well and can heal unevenly. A conservative approach works best—plan for a touch-up instead of trying to fix everything in one session. You can also help your clients learn how to prepare for their first PMUOpens a new window appointment so their skin is ready for the procedure.
Mastering Technique Across All Skin Variations

Using the same pressure on every part of the face just doesn’t work. Understanding skin layers and types is a solid foundation, but putting that knowledge into practice is what makes the difference. If you have more questions about specific client cases, check our PMU FAQsOpens a new window for extra tips. Here’s how to refine your technique for each person in your chair.
Skin Thickness
Skin thickness varies across the face. Eyelid skin is much thinner than brows or lips, so it’s important to adjust your needle depth for each area. If you’re not mindful of these differences, it’s easy to go too deep in one spot and too shallow in another, leading to uneven color and patchy healing.
Stretching and Tension
Keeping the skin taut is essential for clean results. Using a solid three-point stretch keeps the skin flat and firm, helping the needle glide in smoothly without extra trauma. No matter if the skin is oily or dry, a good stretch is key to getting pigment into the right layer.
The Benefit
Refining your technique leads to more consistent results. Healed work looks better, and you’ll spend less time on touch-ups. When you know how to handle different skin types and areas, clients leave with results that last and look great—helping to build your reputation as a true expert.
Ready to See Your Hard Work Truly Pay Off?
Mastering skin mechanics takes practice, but the right setup makes a big difference. When you're ready to level up, using reliable PMU machinesOpens a new window,precise needlesOpens a new window, and stable pigmentsOpens a new window helps you stay consistent on any skin type. Don't forget that proper aftercareOpens a new window is just as important for protecting your results. Every session is another chance to build your confidence.